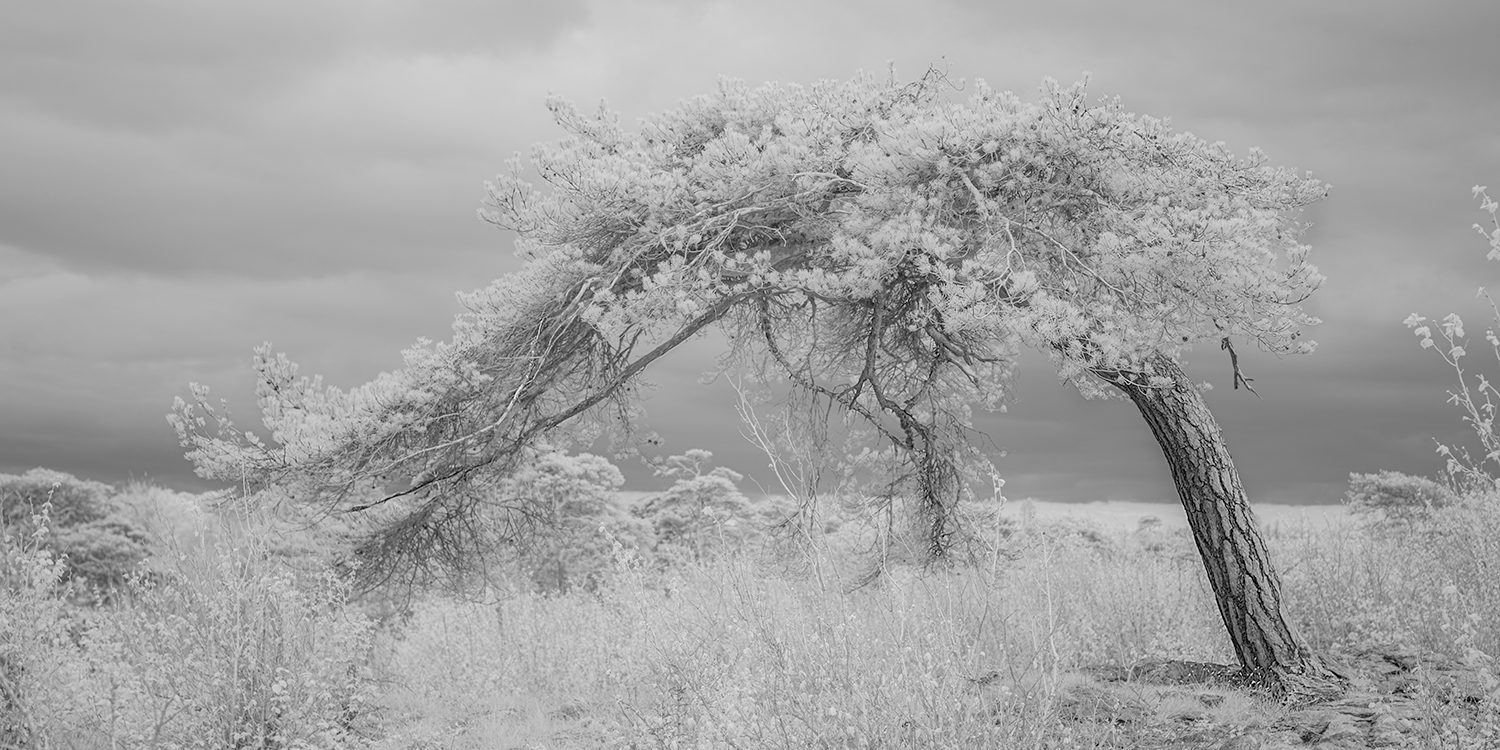
Infra-Red Landscape Photography
In taking the small leap from the Nikon D810 to the D850 a few years back, my D810 was left disconsolate on the shelf collecting dust. Never one to let a good tool go or become redundant, I decided to put it to use by conversion to infra-red. Little did I know that decisions are required as to the type of filter that will replace the IR blocking filter installed in standard cameras. There are a number of options dependent on whether your preferences lean towards IR colour images (665nm), contrasty black and white (830nm), strong//unusual colour images (590nm) or full spectrum (astro photography). I chose the 720nm infra-red from Advanced Camera Services in the UK. This is the standard conversion and provides an option to create IR colour but more commonly it’s the preferred choice for IR black and white images.
The camera was issued to ACS in mid May and received back in mid August so if you are considering a conversion bear in mind a lead time. The cost was 400 STG which included the removal of the IR blocking filter, the installation of the 720nm filter and a standard IR focus adjustment. The camera operates as a standard camera with regard to focus, exposure, ISO, White Balance etc. Just point and click. However, hot spots similar to bad flares occur with certain lenses – a list of lenses best suited to IR photography are available here: https://kolarivision.com/lens-hotspot-list/ . For example, my Sigma 50mm ART lens is unusable due to hot spots but my Nikon 24-120 is a good performer – often cheaper lens are better!
My interest in black and white infra-red photography was largely triggered by a fascination with the other worldly landscape images seen online and in photo magazines. Although there is a wow factor with adeptly processed infra red colour images this does not interest me at this time. For me, infra-red translates as black and white. And although I have previously processed standard colour images as black and white when the light suited the scene, it may simply be the novelty and effect of infra-red that encourages me to shoot more frequently in this style now.
I had assumed that the different world that is infra-red required special field and post processing techniques. So I purchased an online course by Paul Gallagher and Michael Pilkington (https://learnonline.aspect2i.co.uk/course/post-process-infrared-images). Whilst some chapters covered IR techniques such as removal of hot spots, the remainder of the course covered standard post processing techniques. But nonetheless I worked through the course – value was gained and new techniques picked up. IR White Balance seems to be a popular and involved online discussion but I simply set a custom balance based on the brightest area of grass on my first shoot and have not changed it since. It works for me. The images out of the camera are sepia-like with very little colour. My process is quite similar to making a black and white image from a standard colour exposure. I do find that the images are less sharp and this is to be expected from a 720nm conversion – an 830nm produces sharper images though this is as a result of limiting more visible light. Therefore, the images require sharpening and can also take a good deal of micro contrast (clarity) above and beyond adjusting whites and blacks to create more general contrast. So in summary, post processing an infra-red image requires no special skills distinct from your standard processing techniques in tandem with your vision for the final image.
There is a commonly held perception that bright sunny days in summer when foliage renders as very bright tones and the blue sky renders as black are perfect for infra-red photography. This is true if your goal is to make high impact, high contrast images. Although, there is considerably less infra-red light on cloudy days, the subtle differences offered by an infra-red camera on such days are quite appealing. For example a bare tree is rendered darker than expected and any winter foliage surrounding the tree in grasses, mosses etc. is rendered brighter therefore providing excellent separation between the subject and the landscape. The same applies for buildings or any subject in the landscape that does not reflect infra-red light. Subjects such as waterfalls set in forest do not work as well – bright foliage, bright rocks with moss, bright water. However, calm lakes render the water as very dark which can provide excellent contrast with the lake shore trees that will show up brighter than if taken as a standard black and white image. The way an infra-red image renders one of my favourite tree species – the Scot’s Pine – a conversion just to photograph these would suffice – beautiful! I have tried seascapes and the results have been less appealing to me. The subject matter is really an exercise of experimentation to see what works for you.
I’ve selected a number of images in a slider below. In writing this blog, I’ve realised how frequently I’ve taken the IR camera out – more than I thought – but it’s usually on bright, middle of day outings where I’ve not managed to get out of bed for early morning light or alternatively on dull days in a season where colour is not dominate in the landscape. I hope you have found this article useful. Until next time……..


