Shorebirds and specifically species belonging to the Heron, Oystercatcher, Plover and Sandpiper bird families are fascinating subjects for close up “portrait” photography. This field of photography appeals to me and is championed by photographers such as Melissa Groo(US) and Simon Theberge (Canada) amongst others.
The evocative piping calls of shorebirds epitomise coastal shores. Probing bills with unique senses of smell and touch search for preferred invertebrates beneath mud and sand. Migration from Arctic breeding grounds to southern wintering grounds including at the northern range, Ireland are nothing short of impressive.
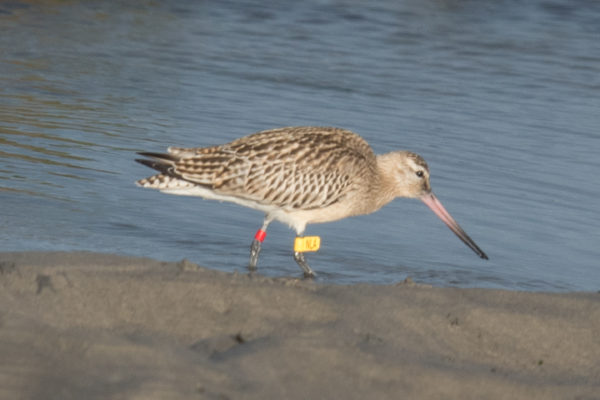
For example, this September I photographed a ringed Bar tailed Godwit at Carne Beach, Wexford – the bird was ringed in Stavanger, Norway only 18 days previous to the sighting!
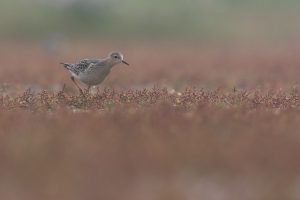
Buff Breasted Sandpiper
Shorebird bills and legs are of varying lengths and shapes. Each bill has a unique design purposed for finding specific food types. Additionally, the open and expressive faces make for strong, appealing portrait subjects. Add to these elements the peaceful, open habitats of mudflats and beaches, mix in rich, natural light and the ingredients for a good image are abundantly present. And so, the photographers work starts
Location, time and tide are considerations of note. preferable to photograph in the hour after sunrise and before sunset to ensure rich, coloured side light which will enhance any image. However, when working with long lenses, limited light at these times negatively impacts ISO and/or shutter speed but conversely favours high apertures
required to isolate the subject against the background.
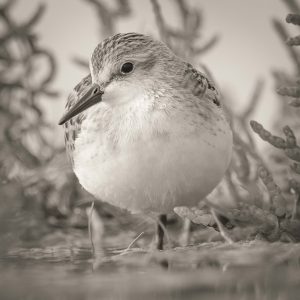
Semi Palmated Sandpiper
Low tide is the worst option as the birds will be dispersed too much. If the tide is incoming, the beach or mudflat may be dried, walked upon, messy etc. However, if you find a place to settle down in the birds will be approaching you pushed in by the tide. Birds feed more actively on an outgoing tide and the tide tends to leave clean, glassy surfaces. So an outgoing tide is optimum
At high tide, birds form tight packs and roost in regularly frequented places. Roosts are good for group shots but beware the image background – many roost sites are upon coastal grass and rock that may appear untidy in the shot. Do not underestimate the importance of the background. You may assume that the background will be out of focus but this only worsens the effect of irregular objects such as trees, clumps of grass or indeed waves. Try to position yourself so that background in even and clean. This is my personal preference.
This semi palmated sandpiper seen at Tacumshin Lake, Wexford was roosting in a spot where the background was irregular and untidy. So a tight crop was called for. Additionally, the colour and tone of the background were a deep green and blue which I found distracting so I desaturated the image in Lightroom.
Next – how to approach the subject? Rule No 1: limit disturbance to a minimum: your presence will disturb birds regardless of distance.
Find a place within an acceptable distance – when birds break from normal behaviour such as hopping away you’ll know. Lie down and don’t move for c.five minutes. Crawl slowly and wait – take your time. Take distant photographs. You are now becoming an acceptable part of their environment. By the way, make sure to wear an old waterproof jacket – you’re going to get wet and muddy. Leave the tripod in the car and get or make a skimmer pad or bring a small bean bag. This device enables you to push the camera through the mud/sand therefore you do not need to stand or kneel to move.
Regardless of using this sniper approach, the most important aspect of making the image is to shoot as close to the eye level of the shorebird as possible – . For example, if a beach slopes down to birds at the waters edge, the sky is not likely to make it into the image if you are above the level of the bird. Another option is wear a wet or semi dry suit and
use a tripod in the water (2-3 feet depth) looking back at the shoreline.
maller species tend to be more approachable. Sanderling are possibly the most photogenic shorebirds busily working the breaking waves.
Dunlin are “dumpier” and although relatively approachable make less characterful portraits almost appearing “hunchbacked”.
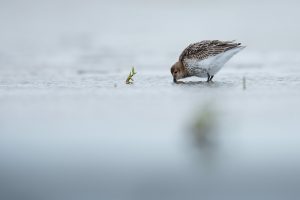
But patience is essential to capture an image you are satisfied with. For example, I was delighted with this image of a Dunlin feeding
– simple, clean background, a little foreground interest and satisfactory light. Others, such as Greenshank are notoriously flighty and I still have no satisfactory images of this stunning shorebird.
As with all bird photography, a lens approximating 600mm is optimal. Today’s high megapixel camera sensors facilitate substantial crops. Sharpening tools in post processing are useful though limited. It’s better to ensure your camera is well anchored – use the skimmer pad/bean bag and additionally use your non shooting hand rested gently on the hood of the lens to keep it as steady as possible. Fine tuning your lens to camera is also important.
For long lenses, this can be more effectively done with a standard battery test than with available software – Google it. Also, you can never take too many images.
Finally, my general rule with post processing is don’t. Landscape images generally require post processing to accommodate the dynamic range between highlights and shadows.
I tend to find that where I do apply contrast and toning to a wildlife image I closely revert to the bare RAW file. Indeed there is a strong argument to shoot JPEGs instead of RAW for bird images. That is not to say, that on an image by image basis post processing such as the darkened vignette and +1 stop exposure on the Sanderling below benefits the image as a whole.
Cropping is the most important consideration. How much and where? If the background is pleasing I tend to crop very little and I have preference for placing the bird on a vertical third
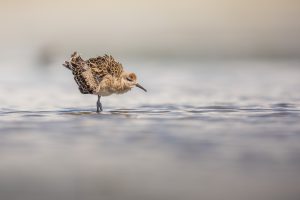
or sometimes in a corner such as the Knot below – this may bewilder some but it is a personal preference. I’ve noticed that getting very close to the water’s edge or wet sand creates wonderful reflections,
often heavily blurred but I think this enhances the image. If you post your images to Flickr or Instagram etc, you will notice that a heavily cropped image will draw more attention
than providing more screen estate for the background. Personally, I consider the background to be as important as the bird.
I hope you have enjoyed reading my take on shorebird photography. Please post any comments or tips you may have below.


Hi Joni,
Its a WordPress site. To be honest I think I would go with one of the many ready made sites if I were to do it again.
Thanks for your comment.
Jimmy
Hi there! Such a wonderful article, thank you!